Writing and maintaining Jenkins Plugins
There are enough quick howto and tutorial pages on Jenkins plugins on the internet, which explain the minimum steps needed to start a plugin project. There is also the extremely long official wiki, with pages varying from extremely detailed and informative, to last updated 2011.
This document aims to be somewhere in the middle between a quick howto and the wiki: it needs to be short enough to be easily kept up to date, but still explain what the steps in the howto pages are for.
Jenkins plugins
Jenkins allows developers to extend its functionality with so called plugins. These are extensions to the Jenkins API that allow us to write code that will be loaded into Jenkins to add to the existing functionality, or change its behavior. This mechanism can be very useful to encapsulate niche functionality, that some Jenkins users might need, without saddling the rest of the user base with vast amounts of functionality they will never use. It also allows users to add custom functionality that is extremely specific for their own project or business.
Each plugin gets its own classloader, which delegates to the Jenkins core classloader. For the context of this blog, it isn’t necessary to know exactly what this means, other than the following consequences:
- Your plugin runs in the JVM of the Jenkins master. If you crash your JVM, Jenkins crashes along with your code.
- Unloading classes from a classloader is not supported. This means a new plugin can be used right away, but deleting or updating an existing plugin requires the Jenkins master to be restarted.
- Your plugin will be loaded system wide. If you change existing behavior for your own builds, everyone else’s builds may be affected as well.
Extension points
The plugin model for extending a system is not without downsides. One misbehaving plugin can take down the whole system. Another disadvantage of plugins in general can be, that it tightly couples a part of the internal API to the client code, forcing you to update all the client code when the internal API changes. Jenkins deals with this by providing extension points; a set of interfaces and abstract classes designed as a contract for implementing or extending functionality. Plugins can also define custom extension points, so you can write plugins to extend other plugins.
There are hundreds of extension points defined. The Jenkins plugin cookbook provides a handy and short overview of the ones you will most likely be interested in for developing your plugin:
| I want to | ExtensionPoint | Sample plugin |
|---|---|---|
| Add a way to log in to Jenkins | SecurityRealm | Google Login Plugin |
| Add a new build type or operation | Builder | Hello World Maven archetype |
| Do something for every build | BuildStep | |
| Trigger some action after a build completes | Publisher | DiscardBuildPublisher |
| Trigger a build | Trigger | Files Found Trigger |
| Record some stat with every project build | Recorder | DiscardBuildPublisher |
| Markup a ChangeLog message | ChangeLogAnnotator | Gerrit Trigger Plugin |
| Add a link to /manage | ManagementLink |
Installing / uninstalling plugins
Jenkins plugins are distributed in the form of hpi files. An hpi file is a jar file that follows certain
conventions. The name of the file before the .hpi is the short name of the plugin, and will be a unique identifier
inside the Jenkins system. The hpi also contains all the jars that contain your plugin code, as well as their
dependencies, and any static resources such as images and html pages. We don’t make these by hand, the
maven-hpi-plugin does this for us.
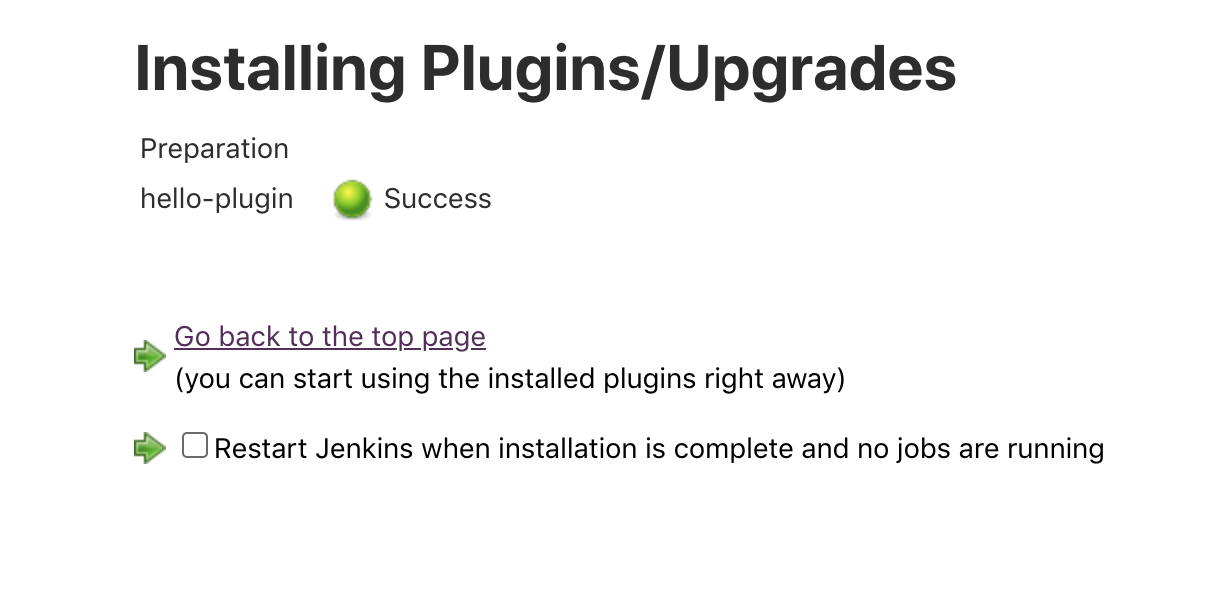
To manage plugins, go to Manage Jenkins > Manage Plugins > Advanced. Here the hpi file can be uploaded

If that is successful, you should be able to see your plugin under Manage Plugins > Installed. Here the plugin can
also be downgraded to the previously installed build, or uninstalled, which will normally require a restart to take
effect.
Writing your own plugin
Before you write your own plugin, Jenkins recommends that you first look at the list of available plugins to see if there is one that already or almost does what you want, and if so, contribute to that rather than starting your own project. This not only saves you time, but also keeps under control the growth of the amount of code in the wild that may break if they make a big change.
Getting started
The easiest way to get started is to use the maven archtype defined for jenkins plugins:
mvn archetype:generate -Dfilter=io.jenkins.archetypes:plugin
This allows you to choose between generating an empty skeleton, containing a pom.xml and the directory structure for
a plugin, a global-configuration-plugin, which creates a section on the Manage Jenkins > Configure System page, and a
hello-world-plugin, which creates a plugin based on the builder extension point.
This article will walk you through creating the hello-world-plugin. You will see that standard maven project structure
has been generated.
<parent>
    <groupId>org.jenkins-ci.plugins</groupId>
    <artifactId>plugin</artifactId>
    <version>3.43</version>
    <relativePath />
</parent>
Hello World
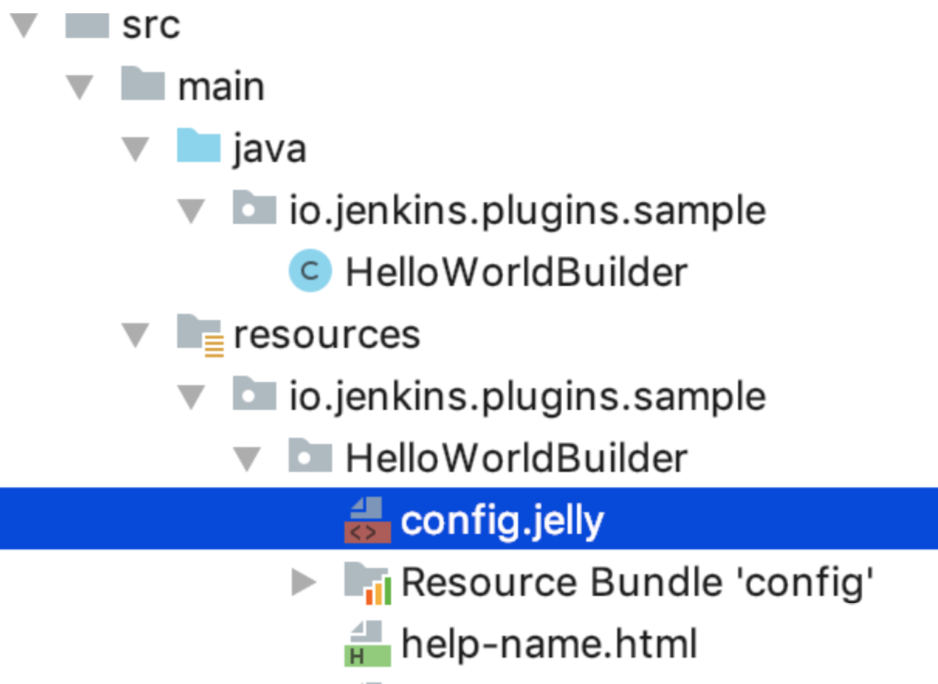
A java class called HelloWorldBuilder has been created under src/main/java, as well as a directory with the same name
under src/main /resources. This is where the UI elements for the HelloWorldBuilder class will be defined. The full
path and directory name must be identical to the package and classname of the corresponding Java class.

The user interface elements are defined in xml templates called config.jelly. Additionally there can be resource
bundles for i18n support, and help files that follow the naming convention help-fieldName.html for each field defined
in the config.jelly file. Configuration-by-naming-convention is used all over in Jenkins Plugin development.
Inside the HelloWorldBuilder class, you find a static inner class called BuildDescriptorImpl, which is annotated with
@Extension, and extends hudson.model.Descriptor. This inner class informs Jenkins about our extension, how it is
instantiated, and how it interacts with the UI elements defined in the jelly files.
@Symbol("greet")
@Extension
public static final class DescriptorImpl extends BuildStepDescriptor<Builder> { ... }
The @Symbol annotation defines the name this Extension will have in the Jenkins pipeline syntax:
node {
  greet "Jenkins"
}

@Override
public boolean isApplicable(Class<? extends AbstractProject> aClass) {
    return aClass.getName().equals("hudson.model.FreeStyleProject");
}
@Override
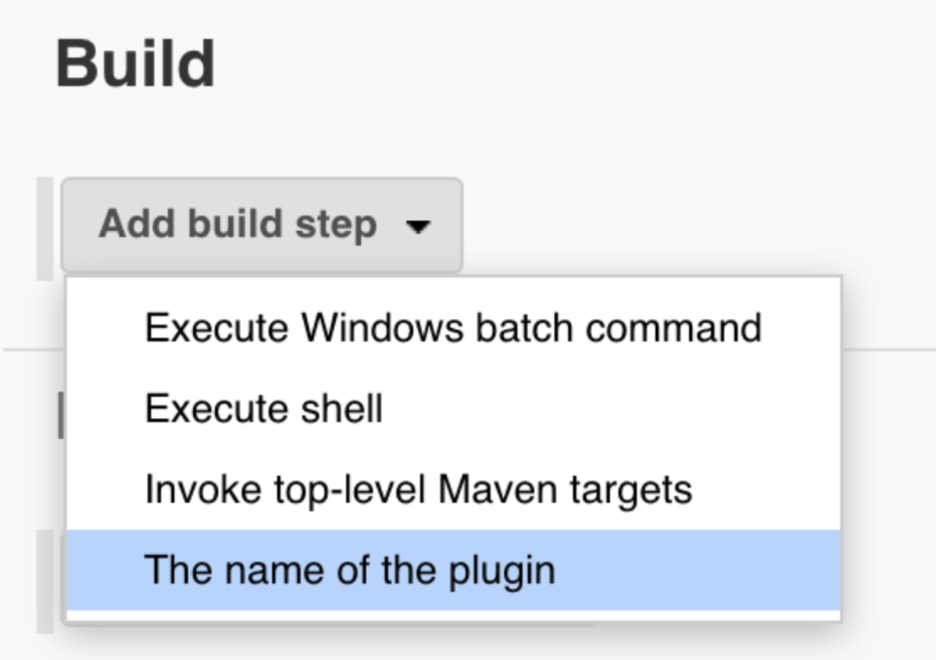
public String getDisplayName() {
    return "The name of the plugin";
}
The getDisplayName method provides the name of the plugin in the configuration of the project in Jenkins, and the
isApplicable method determines whether for which types of Jenkins projects the plugin should be available. Just return
true if the plugin supports all kinds of projects. If this method returns false, this ExtensionPoint will not be
available for any freestyle build, but it it will still be available in a pipeline script.
The Descriptor implementation can also contain the code for validating UI entry fields, following the naming
convention doCheckFieldName, where FieldName is the name of the field in the corresponding jelly file.
public FormValidation doCheckName(@QueryParameter String name) throws IOException, ServletException {
    if(name.length() < 1) {
        return FormValidation.error("Name is required");
    }
    if(Character.isLowerCase(name.charAt(0))) {
        return FormValidation.error("Please capitalize your name");
    }
    return FormValidation.ok();
}
In a similar way, Descriptor methods called doFillFieldNameItems can pre-fill options in a dropdown menu:
public ListBoxModel doFillCredentialsIdItems(@AncestorInPath final Job<?, ?> project, @QueryParameter final String serverURI) {
    return new StandardListBoxModel()
          .includeEmptyValue()
          .includeAs(ACL.SYSTEM, project, StandardUsernamePasswordCredentials.class);
}
This will provide the values for a credentials dropdown defined in jelly:
<f:entry title="Credentials" field="credentialsId">
    <c:select />
</f:entry>
There is more about Jelly form controls on the Jenkins wiki.
The form fields defined this way, are tied to your extension point via a constructor with the @DataBoundConstructor
annotation, or setters annotated with @DataBoundSetter
@DataBoundConstructor
public HelloWorldBuilder(String name) {
    this.name = name;
}
The ExtensionPoint that you are implementing will also have methods such as prebuild, called before Jenkins starts a
build, and perform, which runs during the given build, which you can override to add or change behavior.
@Override
public void perform(Run<?, ?> run, FilePath workspace, Launcher launcher, TaskListener listener)
    throws InterruptedException, IOException {
    listener.getLogger().println("Hello world, " + name);
    listener.getLogger().println("We are running: " + run.getDisplayName() + " in workspace " + workspace);
}
Running the plugin in Intellij
We now have all the code in place to run a build using the plugin. We can run and debug an instance of Jenkins using
the maven hpi:run plugin. This works very nicely in Intellij. Simply make a new Maven run configuration with the
command line: hpi:run

The jetty.port argument in the example above, configures the port this Jenkins instance will be bound to. The
org.jenkins-ci plugin parent pom configures the maven-enforcer plugin with a very strict set of custom rules that will
help you make your plugin work nicely with Jenkins, and help avoid introducing certain obscure bugs. It’s a good idea
not to ignore enforcer warnings and errors, but during developing or debugging the plugin, having your build fail to
run on every enforcer warning can get in the way. You can toggle this behavior off with enforcer.fail=false. It is a
mistake to do this in your release build. If you are confident an issue found by enforcer should be ignored, you can
explicitly suppress it in your code:
/**
 * Should throw an exception in case of null
 */
@SuppressFBWarnings("NP_NULL_ON_SOME_PATH_FROM_RETURN_VALUE")
private VirtualChannel getChannel(FilePath workspace) {
    return workspace.toComputer().getNode().getChannel();
}
Execute the run configuration, and open a browser: http://localhost:8090/jenkins
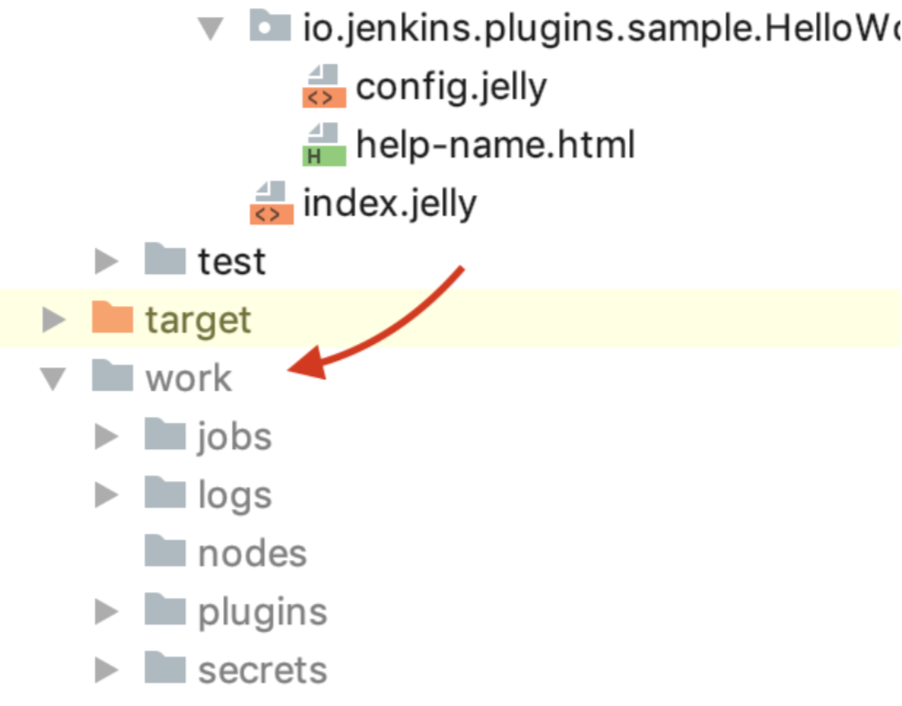
The Jenkins instance started by hpi:run stores its state in a directory called work. Any items you configure in this
Jenkins instance, plugins you install, updates you run, will be stored here. If you need to start from scratch, delete
this directory. It will be re-created on the next hpi:run.

The snippet generator can generate an example of pipeline syntax for thisplugin. For every constructor argument it will
attempt to call a getFieldName() in the extension point, and use the value returned in the example:
Generated snippet:
greet "Jenkins"
For this reason, it is probably not useful to generate simple getters for these fields.
State and serializability
[ERROR] Class io.jenkins.plugins.sample.model.HelloObject defines non-transient non-serializable instance field
unserializableObject [io.jenkins.plugins.sample.model.HelloObject] In HelloObject.java SE_BAD_FIELD
Which occurs when you try to build a plugin project containing a Serializable class that has a non-serializable property:
public class HelloObject implements Serializable {
  private final UnserializableObject unserializableObject;
(...)
Jenkins stores the state of your plugin in XML form, and your code may end up being stopped, restored and resumed. In a multi node Jenkins setup, part or all of your code may be executed on another node. For this reason, the state of your object must be properly (de)serializable. If you need unserializable instance variables in your class, mark them transient, and make sure they can be recreated and initialized from serializable state.
Running on the agent
All of your plugin code will run on the Jenkins master, unless you explicitly write code to execute parts of it on the
agent. This means that any cpu or memory intensive code and blocking calls in your plugin code can have a significant
impact on the master. If your plugin has to perform such operations, you can wrap those parts of your code in a class
that extends hudson.remoting.Callable and run it on an agent. You will also need to do this if your plugin needs to
access the workspace, because the files will be on the agent, not on the master.
public class AgentRunner extends MasterToSlaveCallable<File[], RuntimeException> implements Serializable {
    private static final long serialVersionUID = 1L;
    private final String directory;

    public AgentRunner(String directory) {
      this.directory = directory;
    }

    @Override
    public File[] call() throws RuntimeException {
        return new File(directory).listFiles();
    }
}

(...)

File[] files = launcher.getChannel().call(new AgentRunner(directoryPath));